Beszel Installation
Beszel is a lightweight open-source platform for monitoring servers, including Docker statistics, historical data, and notifications.
It has a friendly web interface, simple configuration, and is ready to use “out of the box”. It supports automatic backup, multi-user mode, OAuth authentication, and API access.
Installing Beszel Hub (Main Component)
Section titled “Installing Beszel Hub (Main Component)”-
Create directory for Beszel and edit docker-compose.yml
Terminal window mkdir /opt/beszel && cd /opt/beszel && nano docker-compose.yml -
Add Beszel Hub to your docker-compose.yml
docker-compose.yml services:beszel:image: henrygd/beszelcontainer_name: beszelrestart: alwaysports:- '127.0.0.1:8090:8090'volumes:- ./beszel_data:/beszel_datalogging:driver: 'json-file'options:max-size: '30m'max-file: '5' -
Run Beszel Hub
Terminal window cd /opt/beszel && docker compose up -d && docker compose logs -f -
Edit your nginx.conf
Terminal window cd /opt/remnawave && nano nginx.conf -
Add
serverandupstreamblocks for Beszel to yournginx.confnginx.conf upstream beszel {server 127.0.0.1:8090;}server {server_name beszel.yourdomain.com;listen 443 ssl;http2 on;ssl_certificate "/etc/nginx/ssl/yourdomain.com/fullchain.pem";ssl_certificate_key "/etc/nginx/ssl/yourdomain.com/privkey.pem";ssl_trusted_certificate "/etc/nginx/ssl/yourdomain.com/fullchain.pem";location / {proxy_http_version 1.1;proxy_pass http://beszel;proxy_set_header Host $host;proxy_set_header Upgrade $http_upgrade;proxy_set_header Connection $connection_upgrade;proxy_set_header X-Real-IP $remote_addr;proxy_set_header X-Forwarded-For $proxy_add_x_forwarded_for;proxy_set_header X-Forwarded-Proto $scheme;proxy_set_header X-Forwarded-Host $host;proxy_set_header X-Forwarded-Port $server_port;proxy_send_timeout 60s;proxy_read_timeout 60s;}} -
Restart your nginx
Terminal window cd /opt/remnawave && docker compose down remnawave-nginx && docker compose up -d remnawave-nginx && docker compose logs -f remnawave-nginx
Account creation
Section titled “Account creation”-
Open your browser and go to your address
https://beszel.example.com -
The Beszel authorization page opens

-
Enter your email address and a complex password to create an account
-
We enter the panel of Beszel
Adding an agent to the Beszel control panel
Section titled “Adding an agent to the Beszel control panel”-
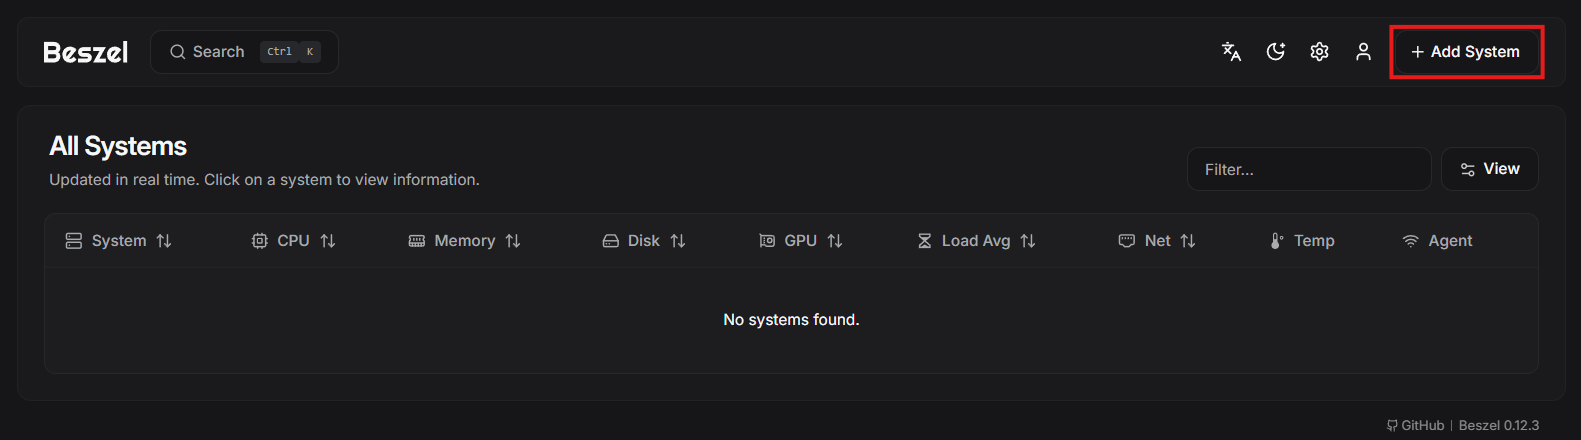
Click on
Add System -
Add your agent to the system
-
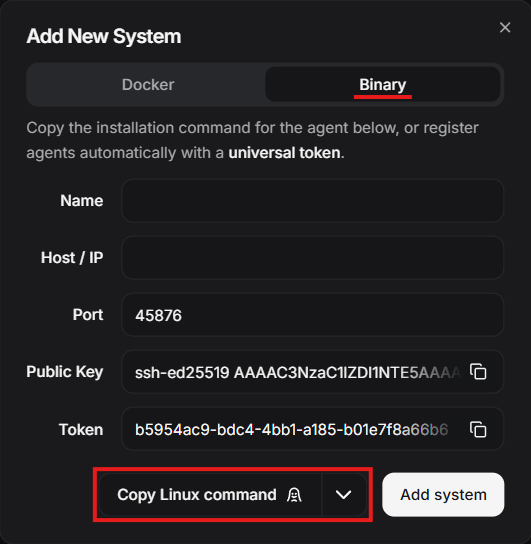
Select Binary connection method
-
Fill in the agent name and specify the IP address of your Remnawave node server. We can leave the port as default (45876)
-
Click on
Copy Linux commandand get the command to install the agent. -
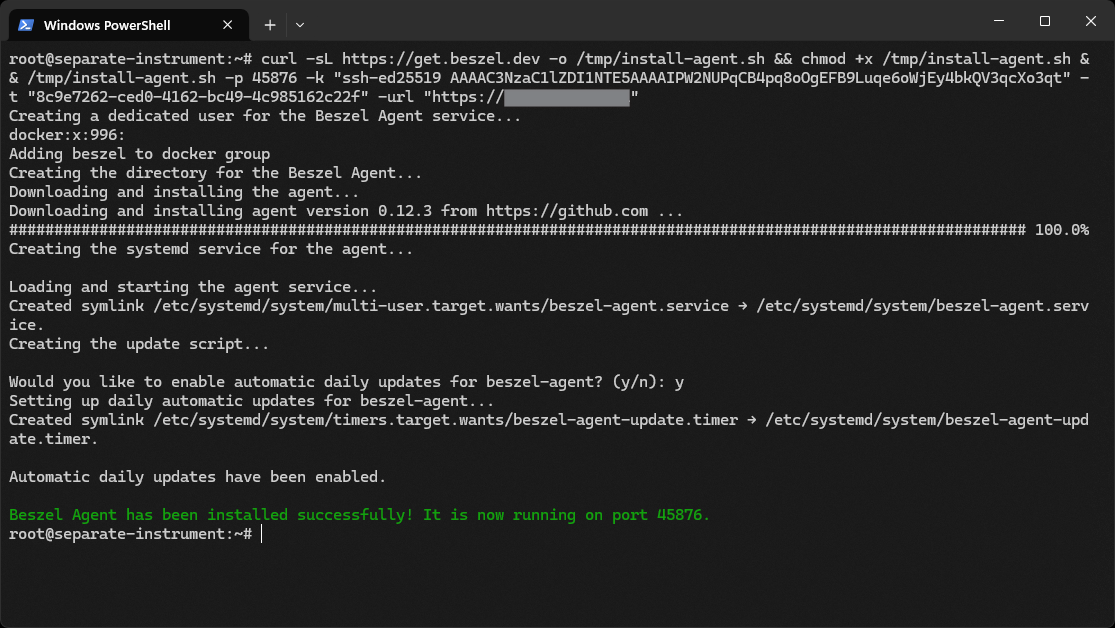
Go to the Remnawave node server and run the copied command.
Terminal window curl -sL https://get.beszel.dev -o /tmp/install-agent.sh && chmod +x /tmp/install-agent.sh && /tmp/install-agent.sh -p 45876 -k "ssh-ed25519 AAAAC3NzaC1lZDI1NTE5AAAAIPW2NUPqCB4pq8oOgEFB9Luqe6oWjEy4bkQV3qcXo3qt" -t "8c9e7262-ced0-4162-bc49-4c985162c22f" -url "https://beszel.example.com" -
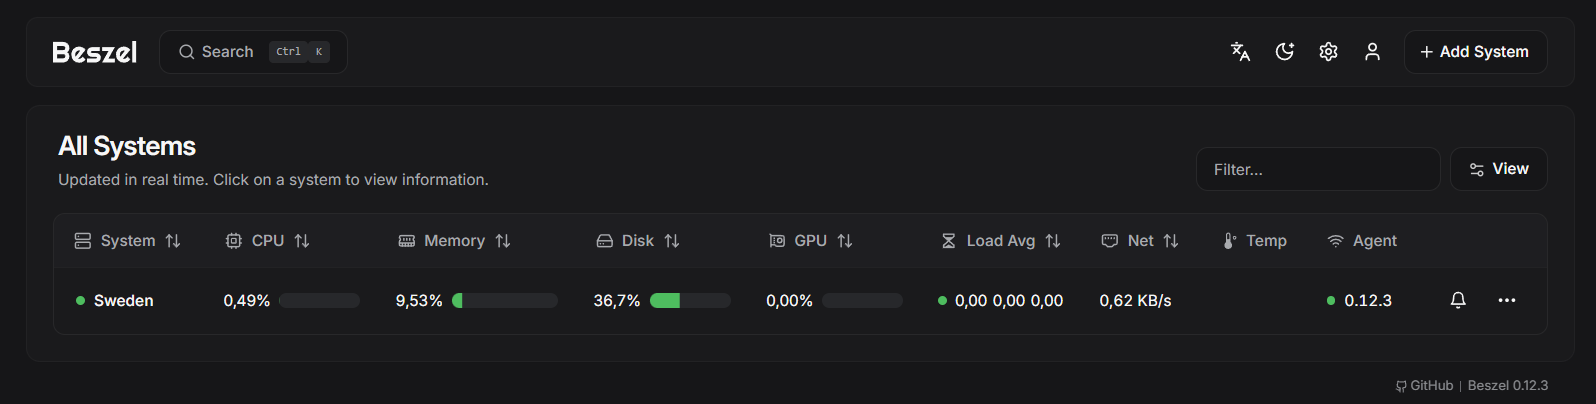
We see that your agent is successfully installed
Setting up the firewall (UFW) on the Remnawave node server
Section titled “Setting up the firewall (UFW) on the Remnawave node server”-
Run the command to open port 45876 (TCP) for the IP address of the Remnawave panel server (replace
100.88.38.121with the actual IP address of your server):Terminal window ufw allow from 100.88.38.121 to any port 45876 proto tcp -
Restart the firewall:
Terminal window ufw reload -
Wait a few minutes for the agent to connect to the Beszel panel. Port 45876 is used for agent communication with the Beszel Hub, so it should only be open for the Hub server IP address.
Setting up notifications in Telegram
Section titled “Setting up notifications in Telegram”-
Open your browser and go to your address
Terminal window https://beszel.example.com -
Log in to the Beszel control panel, enter the login and password you specified when creating the account
-
Go to the
Settingssection
-
Click on
Notification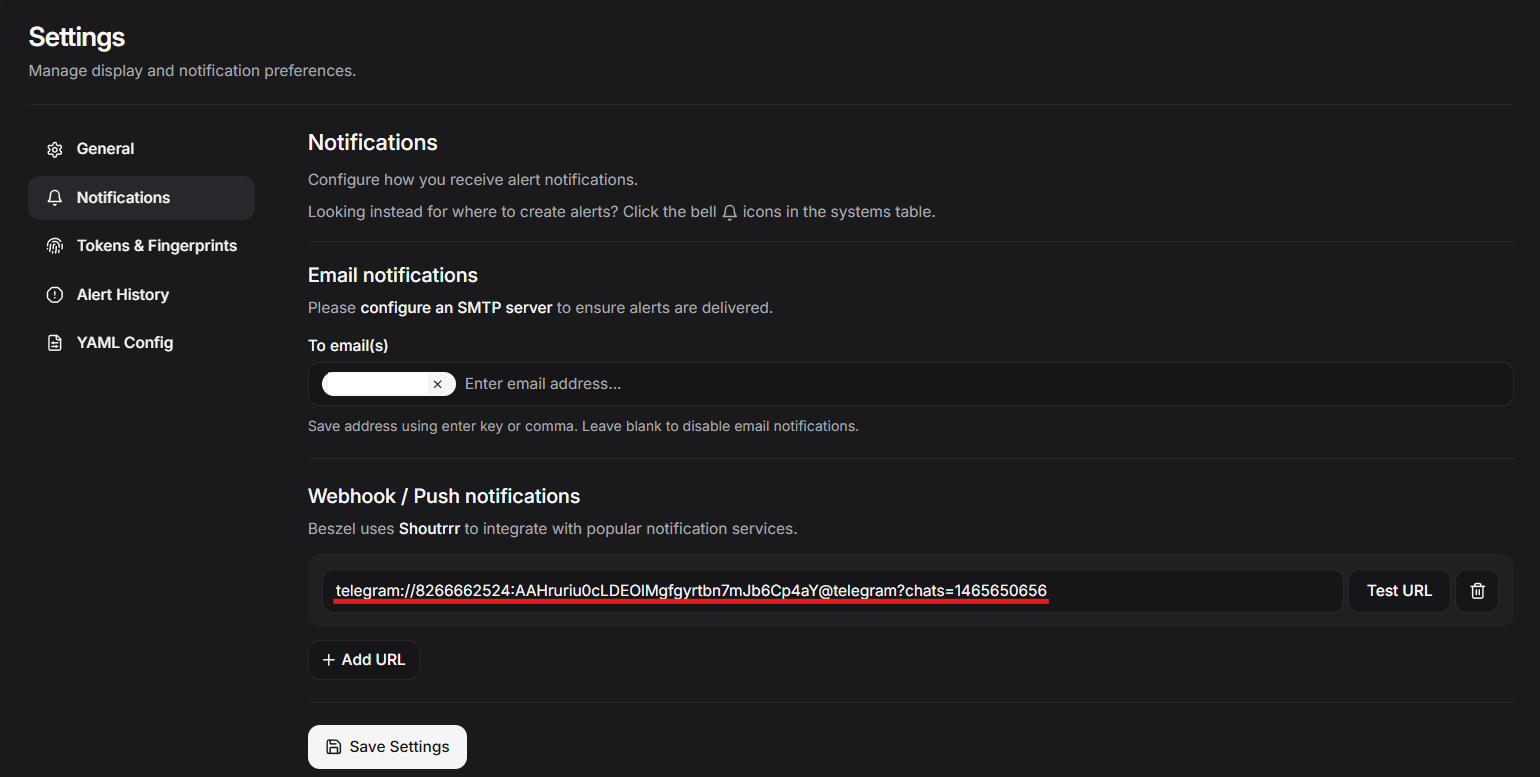
-
In the
Webhook / Push notificationsfield, paste the link in the formatWebhook / Push notifications telegram://8266662524:AAHruriu0cLDEOlMgfgyrtbn7mJb6Cp4aY@telegram?chats=14656506568266662524:AAHruriu0cLDEOlMgfgyrtbn7mJb6Cp4aY- bot token1465650656- ID chat, where notifications will be sent -
Click on
Save Settings