Guide to install and configure Cert Warden
Cert Warden is a centralized client ACME (Automated Certificate Management Environment), designed to simplify SSL/TLS certificate management. It is an open-source solution that provides an API for automating the acquisition, renewal, and distribution of certificates across different systems and services. Cert Warden is designed to simplify certificate management in complex infrastructures, where managing a large number of certificates for different domains or devices is required.
Why do we need Cert Warden?
Section titled “Why do we need Cert Warden?”Cert Warden solves the problem of automating certificate management in complex infrastructures, such as Kubernetes clusters, web applications, or IoT devices. Here are the main reasons why it can be useful:
-
Automation:
- Cert Warden automates the acquisition, renewal, and distribution of SSL/TLS certificates, eliminating the need for manual management, which can be time-consuming and prone to errors.
- Supports automatic renewal of certificates before their expiration date, minimizing the risk of downtime due to expired certificates.
-
Centralized Management:
- Instead of configuring separate ACME clients on each server, Cert Warden allows managing all certificates from a single place. This is especially convenient in large infrastructures with multiple servers or domains.
-
Security:
- Cert Warden uses API keys for client authentication, ensuring secure access to certificates.
- Supports working with trusted certificate authorities, such as Let’s Encrypt, ensuring the use of valid and recognized certificates.
Installation and configuration of Cert Warden
Section titled “Installation and configuration of Cert Warden”-
Create a directory for Cert Warden and create
docker-compose.ymlTerminal window mkdir /opt/certwarden && cd /opt/certwarden && nano docker-compose.ymlInsert the following content:
docker-compose.yml services:certwarden:container_name: certwardenimage: ghcr.io/gregtwallace/certwarden:latestrestart: unless-stoppedports:- '127.0.0.1:4050:4050'volumes:- ./certwarden-data:/app/datanetworks:- remnawave-networklogging:driver: 'json-file'options:max-size: '30m'max-file: '5'networks:remnawave-network:name: remnawave-networkdriver: bridgeexternal: true -
Run Cert Warden
Terminal window cd /opt/certwarden && docker compose up -d && docker compose logs -f -
Add Cert Warden to
nginx.confpanel RemnawaveTerminal window cd /opt/remnawave && nano nginx.confAdd upstream section:
nginx.conf upstream certwarden {server 127.0.0.1:4050;}Add server section:
nginx.conf server {listen 443 ssl;server_name certwarden.yourdomain.com; # Don't forget to add a DNS record in Cloudflarehttp2 on;ssl_certificate "/etc/nginx/ssl/yourdomain.com/fullchain.pem";ssl_certificate_key "/etc/nginx/ssl/yourdomain.com/privkey.pem";ssl_trusted_certificate "/etc/nginx/ssl/yourdomain.com/fullchain.pem";location / {proxy_pass http://certwarden;proxy_set_header Host $host;proxy_set_header X-Real-IP $remote_addr;proxy_set_header X-Forwarded-For $proxy_add_x_forwarded_for;proxy_set_header X-Forwarded-Proto $scheme;}} -
Restart nginx:
Terminal window cd /opt/remnawave && docker compose down remnawave-nginx && docker compose up -d remnawave-nginx -
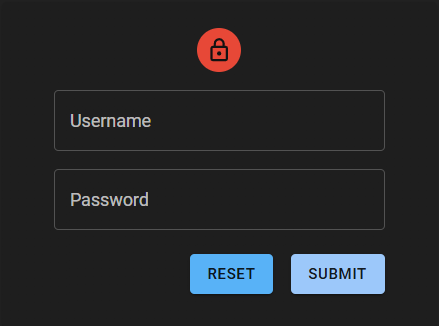
Open your browser and go to the link
Terminal window https://certwarden.yourdomain.com -
Login to the system using the login admin and password password
-
We will be redirected to the main page
-
Go to the
Settingssection and change our current password
Provider Setup
Section titled “Provider Setup”-
Go to the
Providerssection -
Click on
New Provider -
Select
DNS-01 Cloudflare -
In the
Domainsfield, enter the domain for which we will be receiving wildcard certificates -
In the
API Access Methodfield, selectAPI Token. Instructions for creating a token withZone:Editpermissions can be found in the official Cloudflare documentation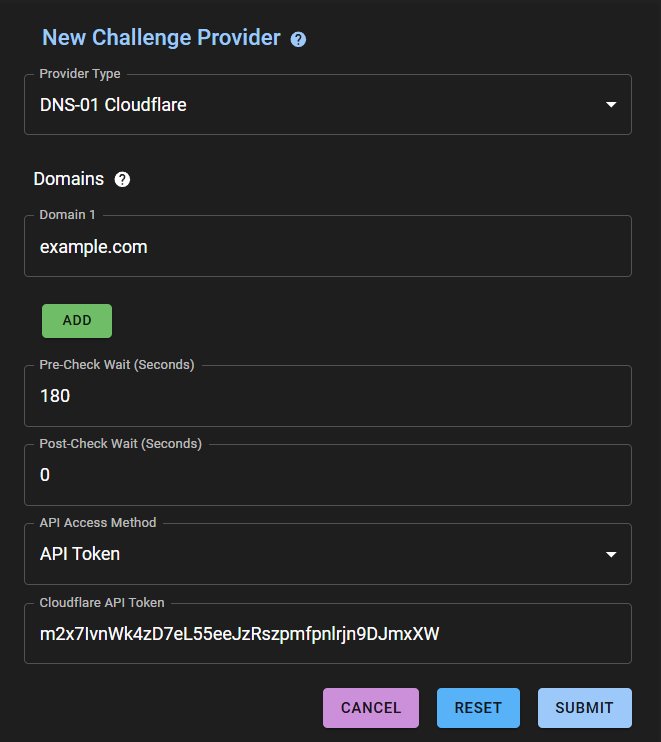
-
Click on the Submit button
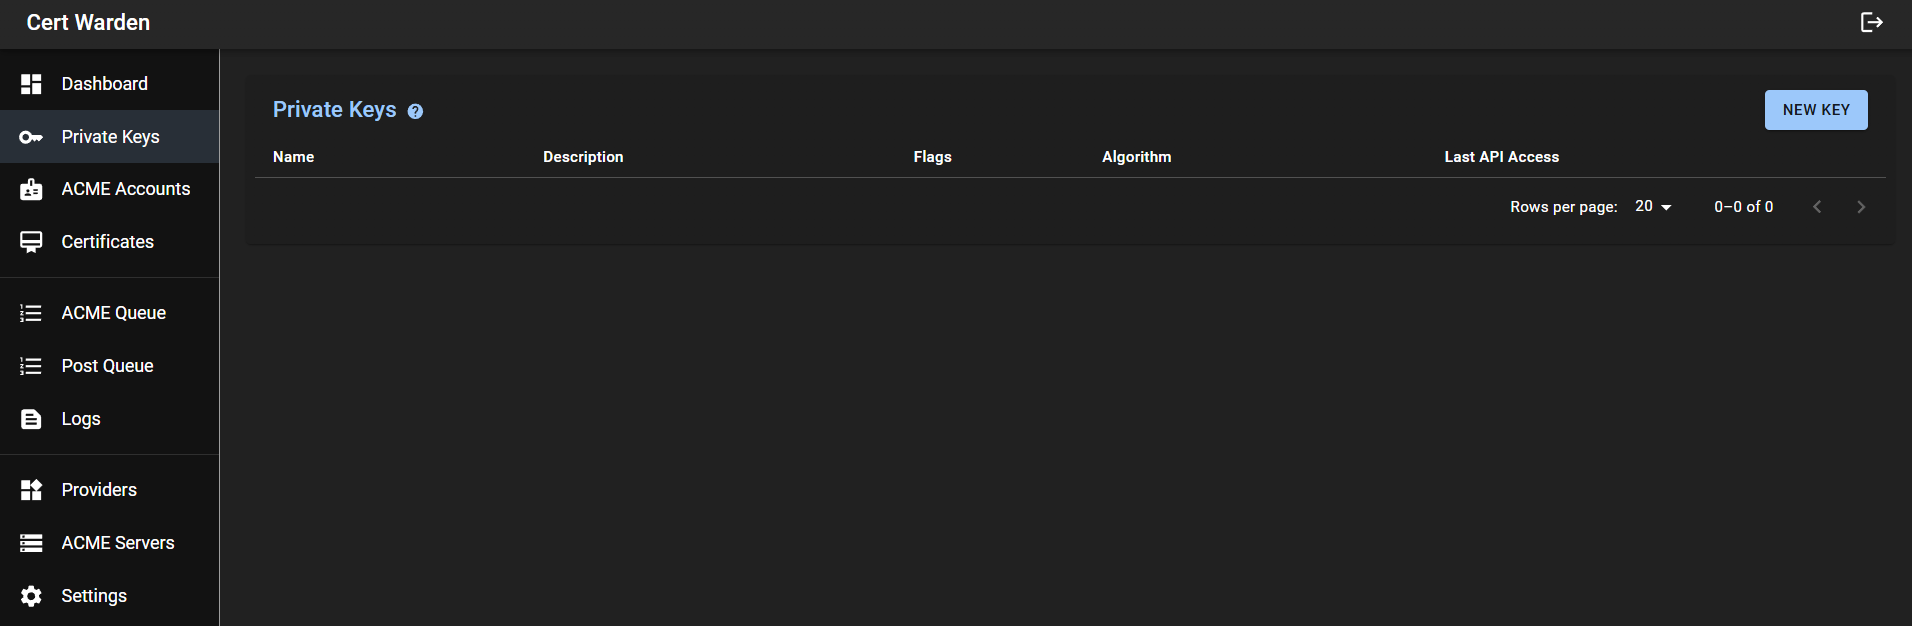
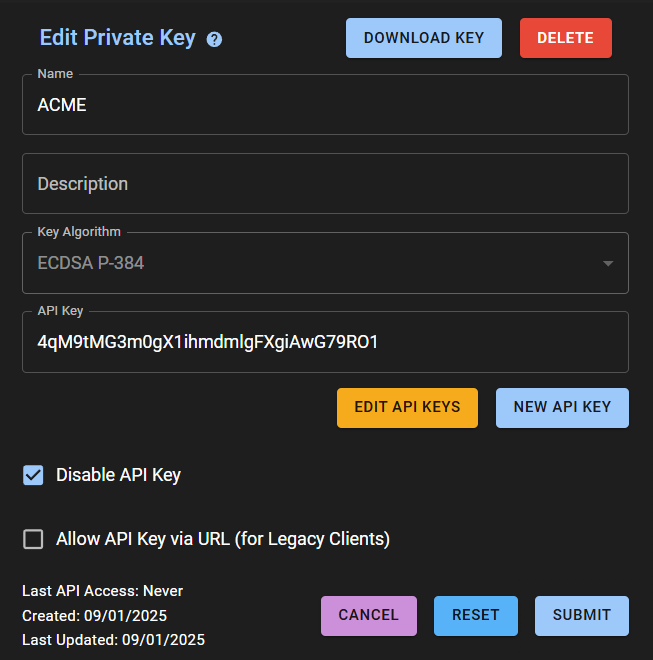
Private Key Setup
Section titled “Private Key Setup”-
Go to the
Private Keyssection -
Click on
New Key -
In the Name field, enter the name of the key (for example,
ACME) -
In the Key Generation Algorithm field, select
ECDSA P-384(recommended algorithm for high security and compatibility) -
Check the Disable API Key box
-
Click on the Submit button
-
A new window will pop up with our Private Key, also click on the Submit button
ACME Accounts Setup
Section titled “ACME Accounts Setup”-
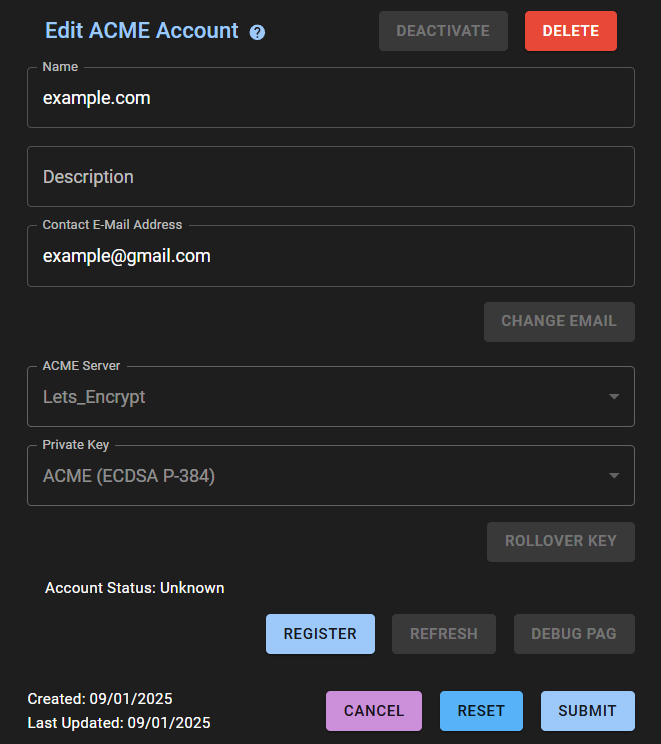
Go to the
ACME Accountssection -
Click on
New Account -
In the Name field, enter the name of our domain or your own other name
-
In the Contact E-mail Address field, enter the email to which notifications will be sent
-
In the ACME Server field, select
Let’s Encrypt -
In the Private Key field, select your previously created key
-
Check the Accept ACME Server`s Terms of Service box
-
Click on the Submit button
-
A window with account data will pop up
-
Click on the REGISTER button and the Account Status should become Valid
-
Click on the Submit button
Certificates Setup
Section titled “Certificates Setup”-
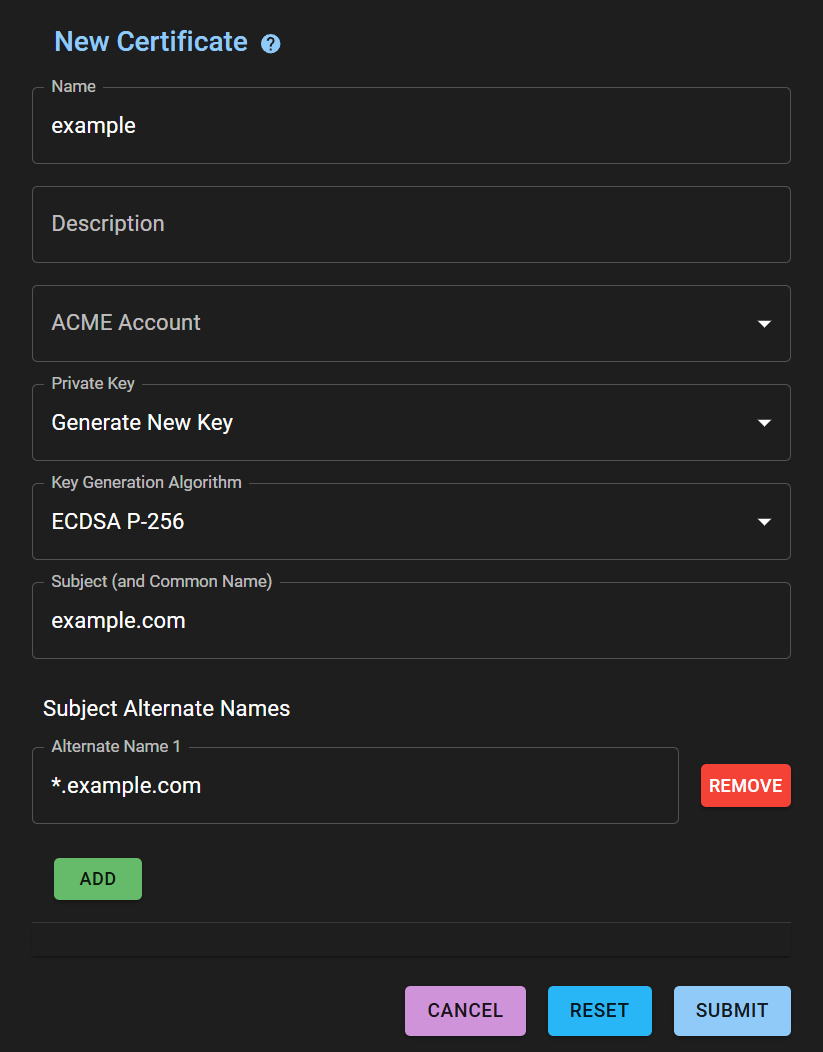
Go to the
Certificatessection -
Click on
New Certificate -
In the Name field, enter the name of our domain or your own other name
-
In the ACME Account field, select the previously created account
-
In the
Subject (and Common Name)field, enter the domain 2 levels, for exampleexample.com -
Click on the
ADDbutton and in theAlternate Name 1field enter the already wildcard domain*.example.com -
Click on the Submit button
-
A window with ACME Orders will pop up

-
Click on the
PLACE NEW ORDERbutton -
Now we wait for the certificate to be received, we can track the status in the
ACME Queuesection, as soon as the domain disappears, the certificate is received -
Go to the
Dashboardsection and see that the certificate is received and how many days are left until the expiration date
Certwarden Client
Section titled “Certwarden Client”Cert Warden Client is a Docker container or application that interacts with the Cert Warden server to automatically acquire and update certificates. It is designed to simplify certificate management on client devices. The client’s main functions include:
- Automatic certificate acquisition: The client makes GET requests to the Cert Warden API using API keys to retrieve keys and certificates.
- Certificate updates: The client monitors certificate updates and automatically loads new versions.
- Docker container restart: If certificates are updated, the client can restart specified Docker containers to pick up the new certificates.
Certwarden Client Installation and Configuration on Remnawave Panel Server
Section titled “Certwarden Client Installation and Configuration on Remnawave Panel Server”-
Create a directory for Cert Warden Client
Terminal window mkdir -p /opt/certwardenclient/certs && cd /opt/certwardenclient && nano docker-compose.ymlInsert the following content:
docker-compose.yml services:certwardenclient:image: ghcr.io/gregtwallace/certwarden-client:latestcontainer_name: certwardenclientrestart: unless-stoppedports:- '127.0.0.1:5055:5055'volumes:- /var/run/docker.sock:/var/run/docker.sock- /opt/certwardenclient/certs:/opt/certwarden/certsenvironment:TZ: "Europe/Moscow"CW_CLIENT_FILE_UPDATE_TIME_START: "02:00"CW_CLIENT_FILE_UPDATE_TIME_END: "03:00"CW_CLIENT_FILE_UPDATE_DAYS_OF_WEEK: "Mon Tue Wed Thu Fri Sat Sun"CW_CLIENT_RESTART_DOCKER_CONTAINER0: "remnawave-nginx"CW_CLIENT_AES_KEY_BASE64: "pLZEc_QvSka8syfQtuTfArblalMKU6C6Ke1uIji0E5g"CW_CLIENT_SERVER_ADDRESS: "https://certwarden.example.com"CW_CLIENT_KEY_NAME: "example.com"CW_CLIENT_KEY_APIKEY: "0UkmZEZK7oieQ6hmz9Fta2obMMZRjAuo"CW_CLIENT_CERT_NAME: "example.com"CW_CLIENT_CERT_APIKEY: "MkYMf7eXO8aB9xiNKqwvNVcDGKJ0Dg6v"CW_CLIENT_CERT_PATH: "/opt/certwarden/certs"CW_CLIENT_KEY_PEM_FILENAME: "privkey.pem"CW_CLIENT_CERTCHAIN_PEM_FILENAME: "fullchain.pem"networks:- remnawave-networklogging:driver: 'json-file'options:max-size: '30m'max-file: '5'networks:remnawave-network:name: remnawave-networkdriver: bridgeexternal: true -
CW_CLIENT_AES_KEY_BASE64- Specify the key generated in theCertificates->Post Processing->Client AES Keysection. Click theGENERATEbutton to obtain the key.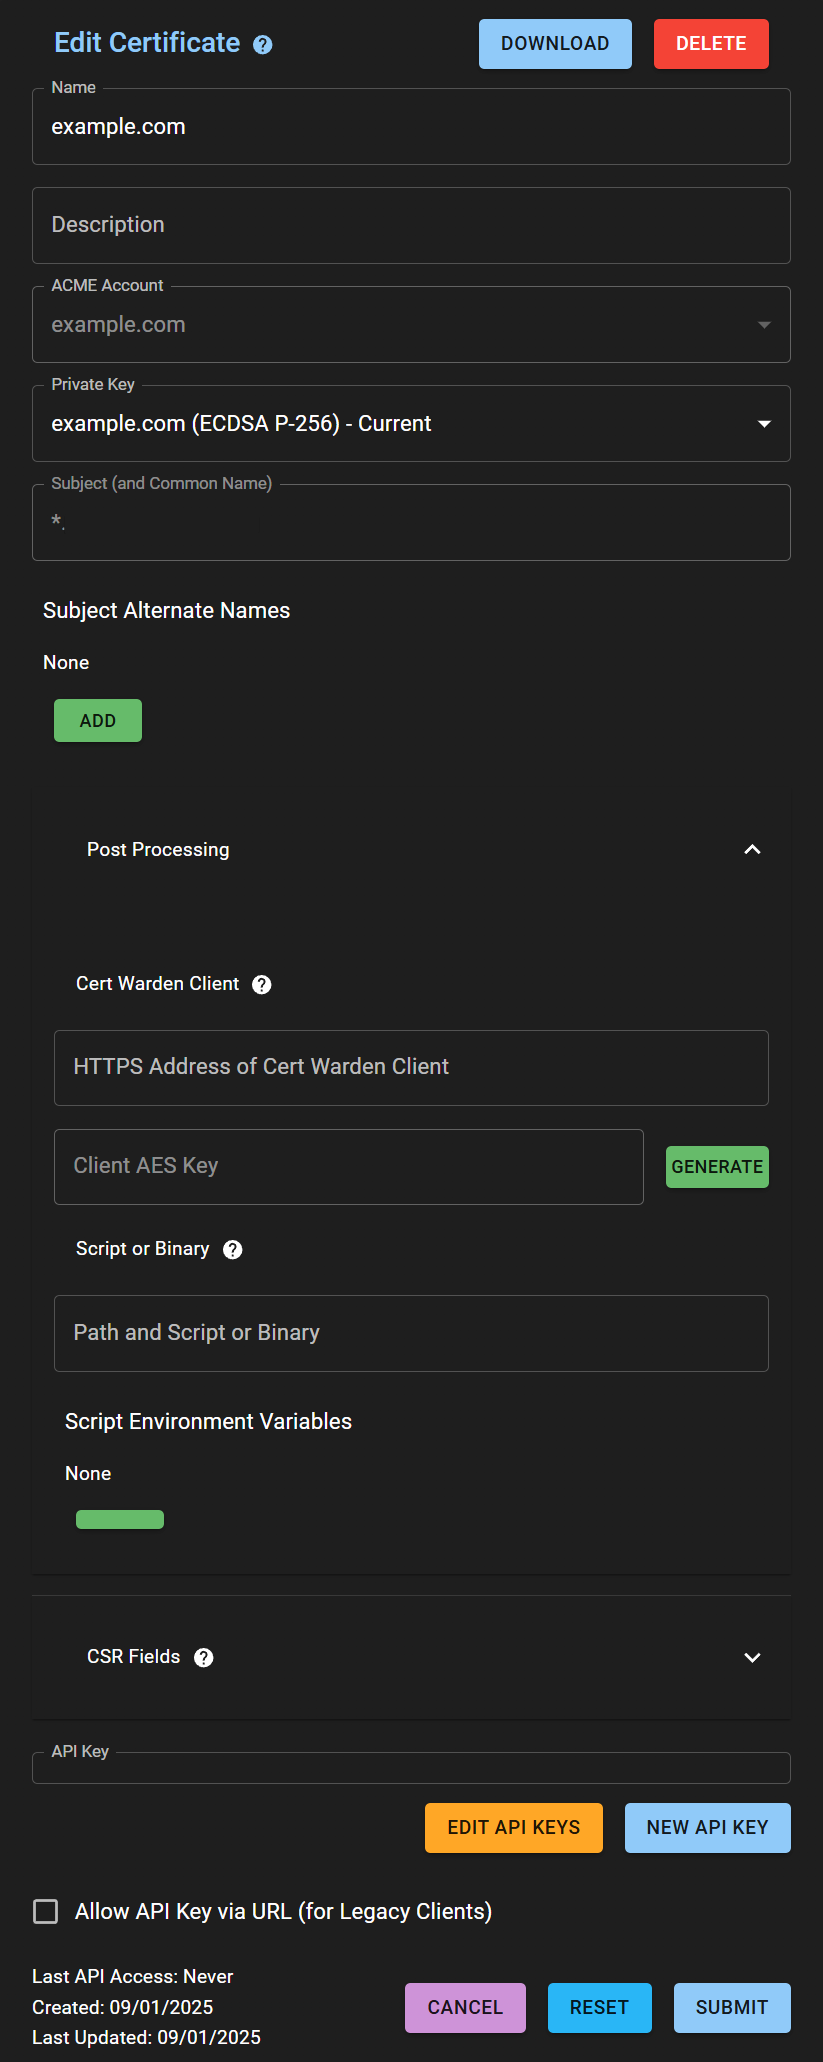
-
CW_CLIENT_SERVER_ADDRESS- Specify the address of the Cert Warden server (e.g.,https://certwarden.example.com) -
CW_CLIENT_KEY_NAME- Specify the name of the key created in thePrivate Keyssection. -
CW_CLIENT_KEY_APIKEY- Specify the API key created in thePrivate Keyssection. -
CW_CLIENT_CERT_NAME- Specify the name of the certificate created in theCertificatessection. -
CW_CLIENT_CERT_APIKEY- Specify the API key created in theCertificatessection. -
Run Cert Warden Client
Terminal window cd /opt/certwardenclient && docker compose up -d && docker compose logs -f -
In the
/opt/certwardenclient/certsfolder, thefullchain.pemandprivkey.pemfiles should appear -
Now we can mount them in our docker-compose.yml in section
remnawave-nginxTerminal window cd /opt/remnawave && nano docker-compose.ymlAdd to volumes, do not forget to specify your domain:
docker-compose.yml volumes:- /opt/certwardenclient/certs/fullchain.pem:/etc/nginx/ssl/yourdomain.com/fullchain.pem- /opt/certwardenclient/certs/privkey.pem:/etc/nginx/ssl/yourdomain.com/privkey.pem -
Restart nginx
Terminal window cd /opt/remnawave && docker compose down remnawave-nginx && docker compose up -d remnawave-nginx
Certwarden Client Installation and Configuration on Remnawave Node Server
Section titled “Certwarden Client Installation and Configuration on Remnawave Node Server”-
Create a directory for Cert Warden Client
Terminal window mkdir -p /opt/certwardenclient/certs && cd /opt/certwardenclient && nano docker-compose.ymlInsert the following content:
docker-compose.yml services:certwardenclient:image: ghcr.io/gregtwallace/certwarden-client:latestcontainer_name: certwardenclientrestart: unless-stoppedports:- '127.0.0.1:5055:5055'volumes:- /var/run/docker.sock:/var/run/docker.sock- /opt/certwardenclient/certs:/opt/certwarden/certsenvironment:TZ: "Europe/Moscow"CW_CLIENT_FILE_UPDATE_TIME_START: "02:00"CW_CLIENT_FILE_UPDATE_TIME_END: "03:00"CW_CLIENT_FILE_UPDATE_DAYS_OF_WEEK: "Mon Tue Wed Thu Fri Sat Sun"CW_CLIENT_RESTART_DOCKER_CONTAINER0: "remnawave-nginx"CW_CLIENT_AES_KEY_BASE64: "pLZEc_QvSka8syfQtuTfArblalMKU6C6Ke1uIji0E5g"CW_CLIENT_SERVER_ADDRESS: "https://certwarden.example.com"CW_CLIENT_KEY_NAME: "example.com"CW_CLIENT_KEY_APIKEY: "0UkmZEZK7oieQ6hmz9Fta2obMMZRjAuo"CW_CLIENT_CERT_NAME: "example.com"CW_CLIENT_CERT_APIKEY: "MkYMf7eXO8aB9xiNKqwvNVcDGKJ0Dg6v"CW_CLIENT_CERT_PATH: "/opt/certwarden/certs"CW_CLIENT_KEY_PEM_FILENAME: "privkey.pem"CW_CLIENT_CERTCHAIN_PEM_FILENAME: "fullchain.pem"logging:driver: 'json-file'options:max-size: '30m'max-file: '5' -
CW_CLIENT_AES_KEY_BASE64- Specify the key generated in theCertificates->Post Processing->Client AES Keysection. Click theGENERATEbutton to obtain the key. -
CW_CLIENT_SERVER_ADDRESS- Specify the address of the Cert Warden server (e.g.,https://certwarden.example.com) -
CW_CLIENT_KEY_NAME- Specify the name of the key created in thePrivate Keyssection. -
CW_CLIENT_KEY_APIKEY- Specify the API key created in thePrivate Keyssection. -
CW_CLIENT_CERT_NAME- Specify the name of the certificate created in theCertificatessection. -
CW_CLIENT_CERT_APIKEY- Specify the API key created in theCertificatessection. -
Run Cert Warden Client
Terminal window cd /opt/certwardenclient && docker compose up -d && docker compose logs -f -
In the
/opt/certwardenclient/certsfolder, thefullchain.pemandprivkey.pemfiles should appear -
Now we can mount them in our docker-compose.yml in section
remnawave-nginxTerminal window cd /opt/remnawave && nano docker-compose.ymlAdd to volumes, do not forget to specify your domain:
docker-compose.yml volumes:- /opt/certwardenclient/certs/fullchain.pem:/etc/nginx/ssl/yourdomain.com/fullchain.pem- /opt/certwardenclient/certs/privkey.pem:/etc/nginx/ssl/yourdomain.com/privkey.pem -
Restart nginx
Terminal window cd /opt/remnawave && docker compose down remnawave-nginx && docker compose up -d remnawave-nginx
Closing access to Certwarden with Netbird
Section titled “Closing access to Certwarden with Netbird”-
Add the Cert Warden server to Netbird, as its installation can be seen here
-
In the Cloudflare control panel for your domain certwarden.yourdomain.com, specify the IP address of the Cert Warden server in the Netbird network
-
Now, to access the Cert Warden page, you will need to connect to your network on your computer through the Netbird application